Brief Documentation on Central Calendar Application
Note: The interface will change and some functionality will increase but this current
beta-version should give you a flavor and a feel. If you can't open the interface
go to java.com and install the lastest java or click on the .exe file
in this directory. This version represents event/meeting broadcasting
and asking for status of potential attendees. Its designed to avoid the typical iterative
email loops that are currently used for this purpose. It also allows all potential attendees
to see each other's availability in real time for specific events. The visual scorecard
(see down below) is meant to allow a visual interface to availability to replace the
current standard of awkward scanning of text/email messaging indicating said availability
and then collating that text based information. This is meant to by-pass all of that.
Also, as I see test events added I will go ahead and indicate some attendee status so
that you can see from a distance, your lights changed without you doing anything
Instructions:
- Download
the Calendar Note: Only have one of these open on your screen at a time
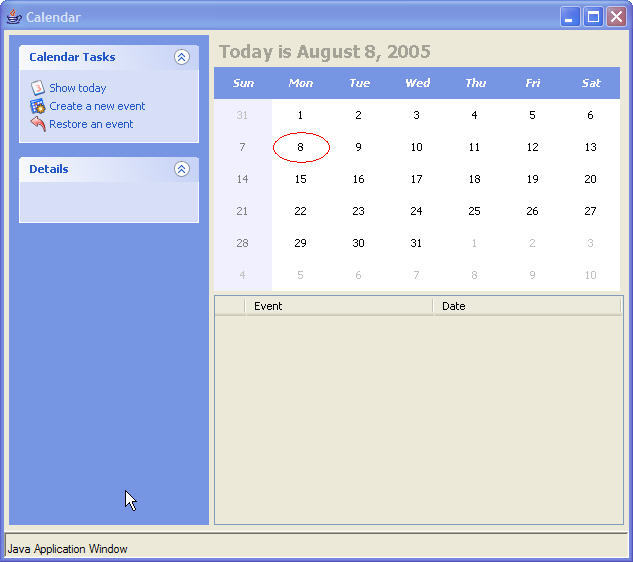
The interface should look like this:
- To create an event click on Create a New Event . That will
bring up this screen:
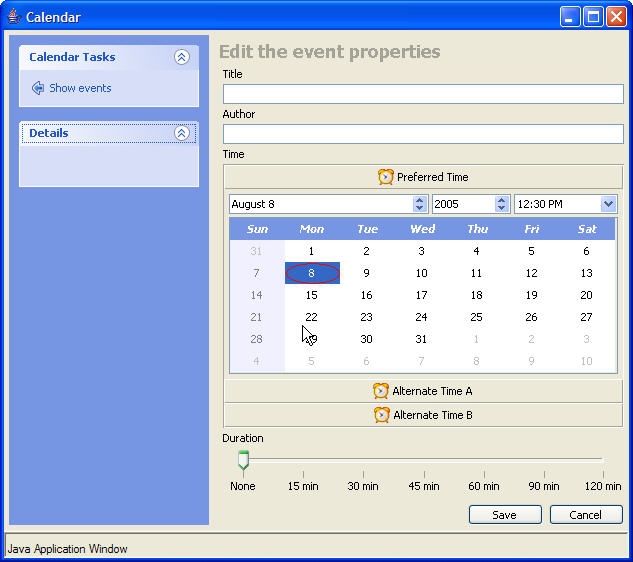
This is basically the event authoring screen. Start by filling in the
Title of the Event and the Author. Example shown below:

- Next You can specific up to three times;
a preferred time and two alternate times. Let's start with the preferred time.
Click on Preferred Time Then
- Click on a Date in the Calendar
- Select times from the drop down menu; times are given in units of 30 minutes.
- Set the meeting duration with the slide bar at the bottom if you like
Now my calendar looks like this:
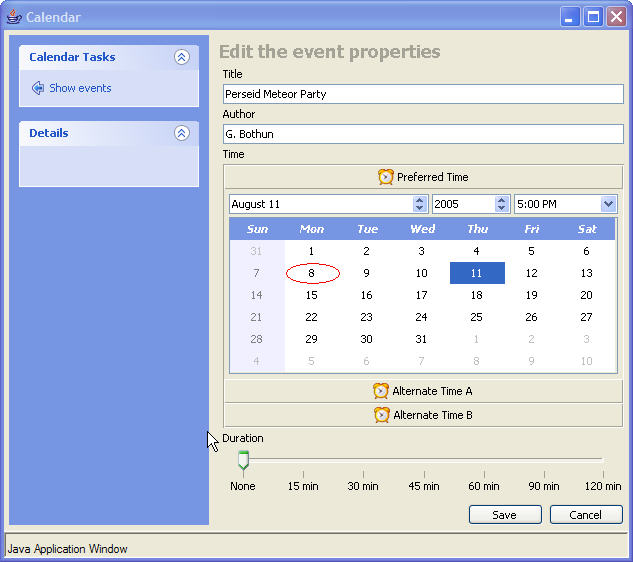
- Now specify two alternate times by clicking on Alternate Time A and B
and specifying the dates/times as done previously. When done click on the
Save button. Your screen now shows your event and the
preferred time:
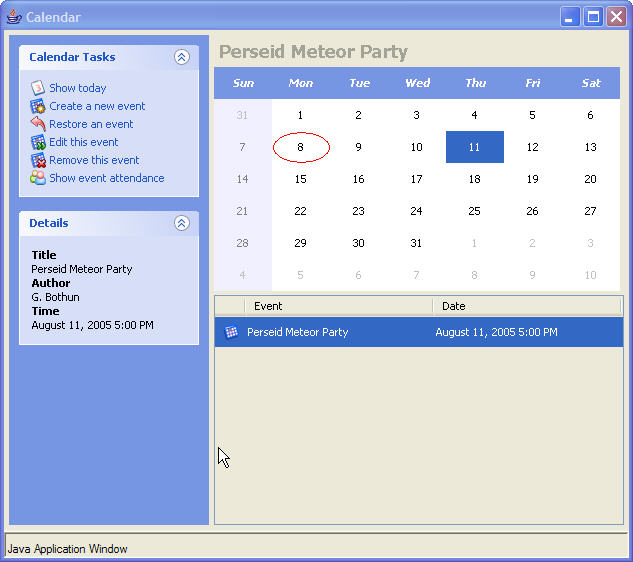
Notice that more items have now shown up under Calendar Tasks and under Details.
- Now this next part will change in terms of interface but not functionality.
Click on Show Event Attendance to bring up this screen:

- Click on Add an attendee (eventually this function will
be replaced with a list management screen/email interface). Your screen now
looks likes this:
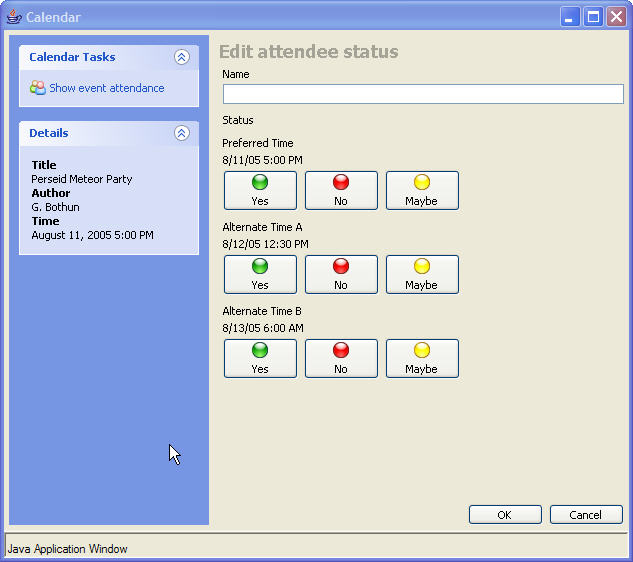
- Add the Name of the attendee and click ok. Currently you have to do this
one attendee at a time - this will change with the list management window, currently
not yet ready. Your screen now looks like this:
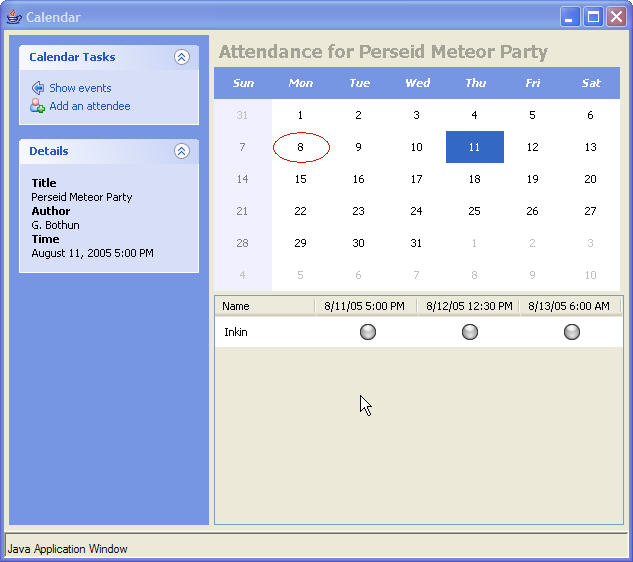
The name of the person is shown as well as the three alternate times. The grey
dots indicates the person has not yet responsed. To add another attendee click
again on Add an attendee . I have now done this for 5 virutal
attendees so my screen now looks like this:
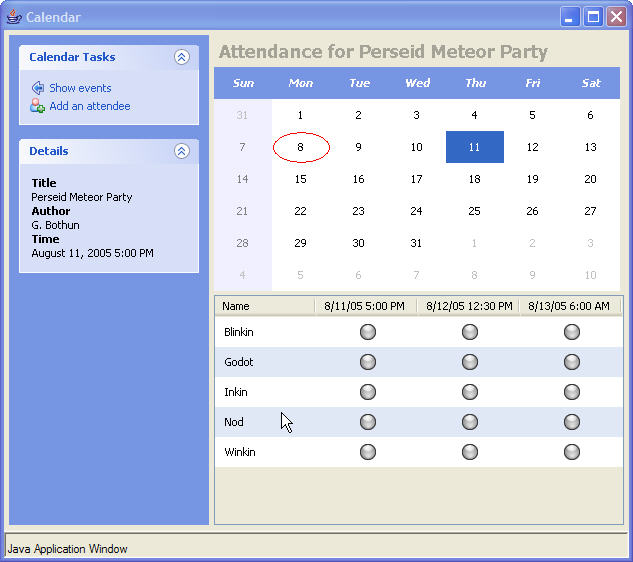
- Okay now, you as author of the event are done. You can just keep this status
screen up and watch the colored lights change in real time as your potential attendees
response. Just send them the URL of the calendar (in step one above) and ask them
to double click on the event you just created and indicate their status by selecting
their name and clicking on a light. You can then monitor this in real time as
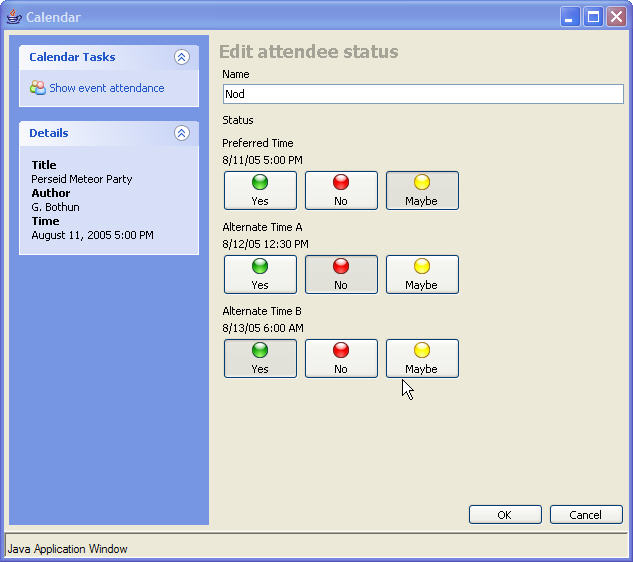
the instantly lights change as people respond. The individual attendee indicates
their availablity by selecting one choice per time. So for instance, Nod has
done this and then clicks the OK button.
- And so here is an example status screen where availability has been indicated and
Winkin hasn't responded yet.
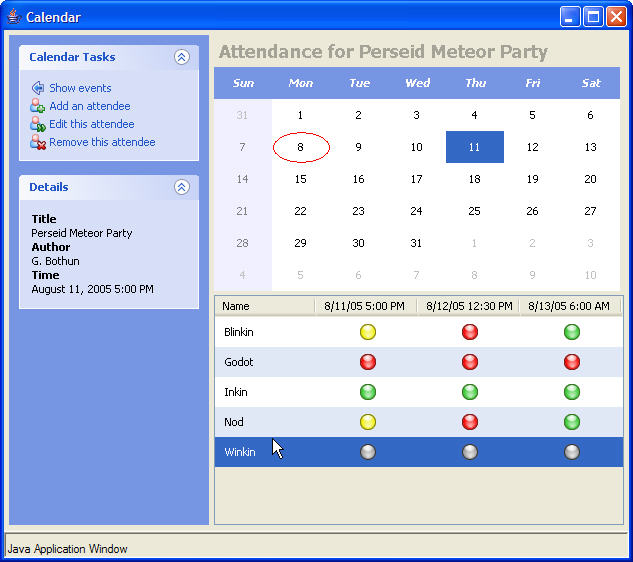
The main feature of this system is the real time changing of
the status screen without any action required on the part of the event creator. Just
leave it up and watch it change and this is what you should be doing with your beta
test partners to get a feel for this. This feature is unique to our engine and no
one else can do this (yet).
Still to do list:
- Implement the list/attendee management screen
- Implement a seperate event editing screen (currently this is combined
on the event authoring screen)
- Add the capability for attendees to post a text note (e.g. I can only make
the first 6 minutes of them meeting, etc)
- Implement SSL connections to secure calendars.
Final note: In this beta test mode, everyone will be able to see everyone's else's
creations which is fine for now as its all testing. When we implement the SSL connections
your event will be designated a unique URL which only the author and the atteendees have
access to.